Lawn Mower Winterizing & Spring Start-Up Guide 2025: Complete Seasonal Storage Protocol

By Ron | Certified Small Engine Mechanic | 15+ Years Experience | Last Updated: May 2025
Two of the most common causes of lawn mower failure have nothing to do with hard use – they happen during the months the mower just sits in the garage. Improper storage (or skipped storage preparation) destroys carburetors, kills batteries, promotes rust, and causes countless spring no-start situations. This guide provides a complete, step-by-step protocol for winterizing any lawn mower at season’s end and bringing it back to perfect operating condition in spring.
Chapter 1: Why Winterization Matters
Modern gasoline – particularly ethanol-blended fuel (E10 or higher) – begins degrading within 30 days. Over a 3-6 month storage period, it separates into layers, absorbs atmospheric moisture, and leaves behind a thick, varnish-like residue in the fuel system. This residue clogs the tiny orifices in a carburetor’s main jet, idle circuit, and emulsion tube. A carburetor destroyed by old fuel can cost $80-$300 to replace or $50-$100 to clean at a dealer.
Batteries, particularly lead-acid batteries, self-discharge during storage. A battery left fully discharged for months undergoes sulfation – a process where lead sulfate crystals form on the battery plates, permanently reducing capacity. A properly maintained battery that should last 4-5 years may fail in 2 if stored improperly.
Chapter 2: Complete Winterization Protocol
Step 1: Final Mow and Deck Cleaning
Before any mechanical preparation, give the mower one final thorough cleaning. Remove all grass clippings from the deck top and underside. Use a pressure washer or garden hose on the underside of the deck. Allow everything to dry completely before storage – moisture trapped under clippings promotes deck rust over winter. After drying, apply a thin coating of deck lubricant spray (silicone-based or WD-40 Specialist) to the underside of the deck to prevent clipping adhesion and surface rust next season.
Step 2: Fuel System – Choose One Method
Method A (Preferred): Run the tank dry. Add a high-quality fuel stabilizer (STA-BIL, Sea Foam, or similar) to the remaining fuel in the tank. Run the engine until it stops from fuel starvation. This ensures the stabilizer has been drawn through the entire fuel system – including the carburetor float bowl and all passages. An engine stored with stabilized fuel in the system will start reliably in spring. Without stabilizer, fuel gums up within weeks.
Method B: Drain completely. Close the fuel shutoff valve (if equipped), drain the tank, then run the engine until all fuel in the carburetor is consumed and the engine stops. Remove and inspect the carburetor float bowl drain screw, drain any remaining fuel. This is the most thorough approach but requires access to a proper fuel disposal method.
Warning: Never store a mower long-term with unstabilized fuel in the system. This is the single most destructive storage mistake.
Step 3: Engine Oil Change
Change the engine oil before storage, not just in spring. This is counterintuitive – many people think “I’ll change it in spring before I use it.” The problem: used engine oil contains combustion byproducts, including carbonic and sulfuric acids. These acids attack internal engine surfaces during storage. Fresh oil protects internal surfaces all winter. Drain the used oil while the engine is still warm from the final mow (warm oil drains more completely). Refill with the manufacturer-specified oil type.
Step 4: Spark Plug Service
Remove the spark plug. Inspect it – if it’s more than 100 hours old or visibly worn, replace it. Whether you replace it or reuse it, apply a small amount of clean engine oil into the spark plug hole (about a teaspoon), then slowly pull the starter cord 2-3 times to distribute the oil across the cylinder walls. This oil film prevents surface rust on the cylinder bore during storage. Reinstall the plug (or the new one) finger-tight only – you’ll torque it to spec in spring.
Step 5: Battery Care (Critical for Riding Mowers)
A battery that sits discharged over winter almost certainly won’t be fully usable come spring. Options in order of preference:
- Remove and connect to a battery maintainer (trickle charger). A battery maintainer (not a standard charger) keeps the battery at full charge without overcharging. Leave it connected all winter. Cost: $20-$40. This is the best approach.
- Remove and store in a temperature-controlled space. Store the battery in a basement or heated garage, not an unheated shed. Cold doesn’t kill batteries, but sub-freezing temperatures dramatically accelerate discharge in an already weakened battery.
- Leave in mower and disconnect the negative terminal. This eliminates parasitic drain but still allows self-discharge. Better than nothing, but less effective than the above options.
Step 6: Blade Removal and Sharpening
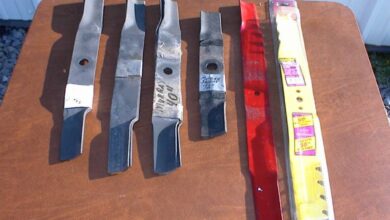
Winter is the ideal time to sharpen and balance the blade – you have time to do it properly, and the mower will be ready to cut perfectly from the first pass in spring. Remove the blade per the procedure in our Blade Sharpening Guide. Sharpen, balance, and either reinstall or store the blade somewhere it won’t be knocked or bent.
Step 7: Lubrication and Cover
Apply grease to all zerks (grease fittings) on the mower. Apply a light spray of lubricant to all exposed, unpainted metal surfaces (axle tubes, blade shaft threads, linkages) to prevent rust. Cover the mower with a breathable cover – not a plastic tarp. Plastic traps condensation, which accelerates rust. A breathable canvas or cloth cover allows moisture vapor to escape while keeping dust off.
Step 8: Storage Location
Store in a dry, covered location. The worst options: outside exposed to weather (obvious), directly on a concrete floor (concrete wicks moisture, which transfers to the metal frame and accelerates rust). If storing on concrete is unavoidable, place a piece of wood or a rubber mat under the mower’s wheels and frame to break the moisture-wicking contact.
Chapter 3: Spring Start-Up Protocol
If you followed the winterization steps above, spring startup should be straightforward. If you find a no-start situation despite proper winterization, work through this protocol:
Pre-Season Inspection Checklist
- (Check) Check engine oil level before any attempt to start
- (Check) Add fresh fuel (not more than 30 days old, E10 maximum)
- (Check) Reinstall or reconnect the battery; verify charge
- (Check) Inspect all belts for cracking or glazing after winter storage
- (Check) Check tire pressure – tires lose pressure over winter
- (Check) Inspect blade condition
- (Check) Lubricate all cables and pivot points
Cold Start Procedure (After Winter)
- Open the fuel shutoff valve (if equipped)
- Set choke to full choke position
- Prime the bulb 3x if equipped
- Turn the key and crank for no more than 5 seconds at a time – pause 30 seconds between attempts to prevent starter motor overheating
- Once running, move choke to half-choke for 30 seconds, then fully open
- Allow a 5-minute warm-up at low idle before any load
Spring No-Start Troubleshooting
Engine cranks but won’t fire: If fuel was not properly stabilized, the carburetor is almost certainly gummed. Remove and clean the carburetor, or spray carburetor cleaner directly into the air intake as a test. If the engine fires briefly on the cleaner, carburetor gum is confirmed.
Engine fires but won’t continue running: Same carburetor diagnosis – the idle circuit or main jet is partially clogged. The engine can run briefly on raw fuel but can’t pull fuel normally through the gummed passages.
Starter won’t engage (electric start): Dead or sulfated battery. Attempt to jump-start with a car battery (12V systems only, not 6V systems on older equipment). If the mower starts on a jump but won’t hold a charge, test and replace the battery.
Chapter 4: Electric Mower Storage – Different Rules
Battery-powered electric mowers have completely different storage requirements than gas models. There is no fuel system to deal with, but the lithium-ion battery pack requires specific care.
- Do not store fully charged or fully depleted. Store lithium-ion batteries at 40-60% charge for long-term storage. This minimizes chemical stress on the cells.
- Avoid extreme temperatures. Li-ion batteries stored below -10C or above 40C experience accelerated degradation. Store in a climate-controlled space.
- Blade and deck care is identical to gas mowers – sharpen blades, clean decks, apply rust preventative to unpainted surfaces.
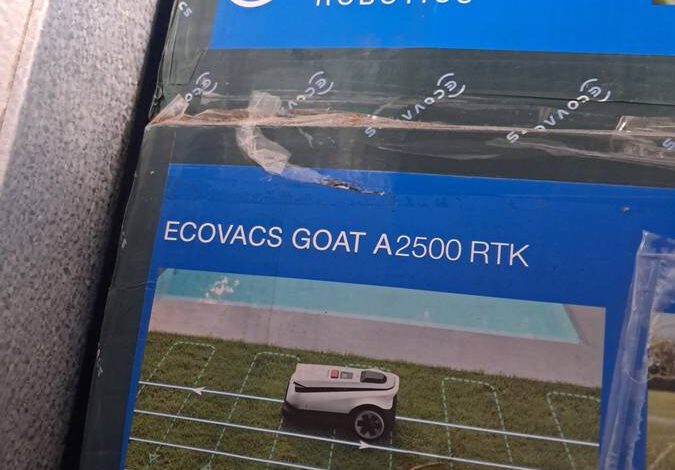
- Check firmware updates for smart electric mowers (robotic or connected platforms) before the season begins. Updates often include battery management improvements.
For battery care specific to robotic mowers, see our Robotic Mower Maintenance Guide.
Conclusion
Proper seasonal maintenance – specifically winterization – is the single highest-leverage maintenance activity for lawn mower longevity. Thirty minutes of careful preparation in autumn eliminates the most common causes of spring failures and extends the life of every system on the mower. Follow this protocol every year without exception, and your mower will reward you with years of dependable spring startups.
About the Author: Ron is a certified small engine mechanic with 15+ years of professional experience in seasonal equipment maintenance, storage protocols, and spring tune-up procedures.